Image Map

Thursday, December 31, 2015

Reflecting On All Things Gingerbread before 2016...

 Wow, I am so late to the party but I have really been trying to take a break and enjoy my winter break. It has been fantastic and I have loved every second of it. Before I can wish you a Happy New Year I need to show you some of my December pictures and all the fun we had during the last few days.

I love doing a Gingerbread unit each year and comparing the characters in each version, talking about the "bad guy" and how the events can differ from story to story. It is so much fun to change my voice and stop right before the fox gobbles up that yummy cookie! Each year I buy more books and add to my crazy collection. These are just a few favorites that I have purchased.
I always love to send a gingerbread man home for families to decorate to their hearts content. The kids love to bring them back and show them off to the class.  The parents adore this project and it fills your classroom with such cuteness. Try it!~

If you are on this blog you know how much I love making a sight word game for each theme that I teach and I won't disappoint you... here is another one. I think the chant was "Gingerbread, gingerbread... you are so sweet, run from the fox, or you will be his treat!"
 I made some new math centers this year and one was all about reading a ten frame and recording the number. I started off teaching this in a small group and the kids loved using a clipboard and working with a partner to record their answer. I now make one of these for each theme I teach. This one focused on teen numbers.

 This is an oldie but goodie just for reviewing numbers and practicing their formation. I have the kids use the eraser on the back of a pencil to make the buttons by dipping it in an ink pad. This makes this activity so much more fun for them. I love when math and literacy can be merged.
 We are working on beginning sounds so I started off with an easy version of this using an Open Court sound/ spelling image in the corner of each card. For the child who still cannot figure out the beginning sound for the picture this is a great scaffold to ensure they are successful.


 When will my students get tired of these fishing poles? Never. I cannot imagine them not loving anything I put in this sensory table for them to fish out. I should have filled it with something like colored rice to make it more exciting... next year. This is just another beginning sounds game that has them color in the letter on a response sheet. The sight word coloring sheet is just another way of getting to those color words and the kids still love this activity.


 This was a new activity for me this year. Students had to cut and paste pictures into this grid that begin with the sound being focused on. Some of the pictures are wrong so it makes the littles really think! I introduce this in my guided reading groups but eventually the kids do this independently. I can adapt this for students who need additional practice by just changing the image to something that reflects the theme we are working on... hello winter.


Yes life must include playdough so we added in our favorite kind. Gingerbread playdough rocks and the kids loved using it. I also showed them how to make their own gingerbread man and they loved doing this. They were so adorable.

 After a bizillion centers we finally had our Gingerbread Activity Day and our parents came in to help with the different centers I had. They did an amazing job with all the kids and we ended our day by going outside to eat gingerbread cookies. Most of the kids loved them.


 So it was a great week. The parents were so sweet and helpful and cleaned up all the mess with me. I hugged the children good-bye and set the room up for January. All gingerbread things were put away for another year. A new calendar went up. I turned off the lights and left earlier than usual and was ready for that much needed winter break.
I will be ready for 2016 and a new set of goals for my students. I got to spend time with many friends that I love, family that I cherish, and finally read a book and got some much needed sleep. Now it is time to build new memories...

Monday, November 30, 2015

Cyber Smile Sale on TpT... Grab Some Goodies


TpT is having a great sale today and tomorrow. Now you can stock up on all those materials for the winter months and save some money. It's a win- win for teachers! Don't forget the promo code today: SMILE so you can get the full 28% off. Have fun and fill your cart with happiness. If you want some of my products you can find them here: http://bit.ly/1gD5LR7.

How cute is this picture of me? It makes me smile because both of my girls looked like this and so do the cousins. I love old family pictures.


Sunday, November 29, 2015

Turkey Leftovers From My Classroom!


November has been such a busy month for us. At this time of the year I am assessing students to get ready for report cards but it is also the wonderful season of fall and I love teaching about the Wampanoag culture and reading fun stories about turkeys and Thanksgiving. This year I did a billion and one activities but I will only hit the ones I loved or better yet- have pictures of. We grew seeds in the backyard of my classroom and this time a mom had the kids help her put soil in about 5. How smart was she? One of them is bound to grow and several did! This is an early picture and I cannot wait to see what the pumpkins look like this week. We talked about decomposing and the kids never get tired of watching these. If you have never done this promise yourself you will try it next year.
Whatever concepts I needed to teach during these weeks had a picture of a Wampanoag or pilgrim. This was a simple math game where they just counting the dots on each card and recorded it and I ran it on old scrap booking paper and distressed the edges with brown ink to make it look old. The kids really liked this activity and it was a great formative assessment. Does anyone know how to make a 5 without reversing it. Nope.


We played lots of sight word games with cards and spinners and showed different ways to make numbers using an image of the Mayflower to spice things up! All of these were a big hit with the littles.

Here is a fall fluency chart we worked on to build their confidence before going to a little reader that matches this text. We built the sentences in a pocket chart with a matching picture and talked about adding "s" to show more than one. This is a great strategy to use when teaching new vocabulary.


We made a variety of maps and labeled them as we completed our Social Studies unit on working together. I also teach the children top, bottom, left and right while we complete this activity.
At this time of year we are working on story elements and we sorted character, setting, and event in a pocket chart. Some students found this challenging but we worked on it together and students had to support their ideas when they placed the picture in the chart. It was a great activity to do and I will keep working on this...
I love teaching guided drawing which then leads to their writing. This was so much fun and provided an opportunity for me to teach about the pilgrim children, what they wore and the jobs they did to help their families. We also talked about their clothing and compared many things to then and now. The kids did these on clipboards sitting on the learning carpet and loved their results!

I love providing these mini anchor charts when I asked students to write independently. It makes them so much more successful since it triggers their creativity and anchors their thinking. How cute are these 2 drawings? I love this age.

This year I was not interested in sending home the same old turkey for families to decorate so I decided to do a thankful plate. What are you thankful for as we approach this important American holiday? My students and I talked about gratitude and I sent this plate home with a note to the parents offering suggestions for making this. They knocked it out of the park! They were SPECTACULAR AND I CRIED OVER EACH ONE... NOT EVEN KIDDING. Parents really worked hard with their children and were so creative. I just took a few pictures but all of them were amazing. Their words were so beautiful and the family photos were so special. This was not my idea but I have had many friends on have done this and now I am trying to decide what I can do for the winter holidays that will be more meaningful. My students were so proud of their work that we ended up showing them to the principal. You have to try this project!


As Friday rolled around I was starting to fall apart from all the projects, activities and the mess. The kids love all headbands so I came up with this super simple one and when I modeled how to make a turkey feather you cannot imagine how much they loved this activity. It was silent in the room as everyone got to work trying this new "feathering" skill. Kids helped each other and now I realize why we have to release kids to do things on their own... yup it is painful.

This simple little turkey is so kid friendly. I walked them through the process and curly the feather on a pencil was the best part of their day! It felt magical to them and I loved their enthusiasm. I think they are so adorable and full of personality. These went home for the holidays.
I hope you got a few ideas for next year and now we are on to The Gingerbread Man which I love. I think I own every book possible for teaching this story and the kids never get tired of it. Check back soon and I hope your turkey day was filled with family, good times and memories that will keep you warm in the winter!

Sunday, October 25, 2015

Snapshot Of Our Room

Hi there,
I have not really disappeared but I have been missing for a few weeks. The year started off with a bang and I have been really busy planning activities to keep an active and chatty group of children busy and engaged in learning. This is no easy job as many of you well know but I have given it my best shot. Here are some photos of what has been going on in September and October...

September was all about apples and exploring their understanding through both Science and Social Studies. We saw lots of  You Tube videos on Johnny Appleseed and the life cycle of an apple. I made several apple readers that they loved too.
 I am all over subitizing and practicing it with my students. This has really made a difference in their ability to recognize the number of dots on dice when playing games. I made a Power Point where I click through the dots at top speed and they love "racing" to tell me the answer. This has been so much fun and can be changed throughout the year depending on our theme. It is really building number sense quickly.

 I introduced a variety of sight words but used apple images to help to build their academic vocabulary. This game was a huge hit but I got tired of playing it (the kids were fine with it) so after about a week I had to change it or go nuts! Yup,it's all about me!
 I cut up a variety of apples and read stories about apple orchards so naturally we labeled a picture but mine is super simple to cut apart since not all children have mastered this skill yet. No one got a hair cut that day so I felt in control of the whole situation. They are so cute that I put them up around the room. We also did a guided drawing of an apple which they loved.
 Yup, Chef Kramer showed up with her crock pot and showed the children how to make applesauce from the apples our parents had sent in. I only added a little sugar and some cinnamon and it was a big hit. Most kids loved it but some would not even touch it which surprised me. How do you handle students who refuse to taste something. I try not to make a big deal of it. No one likes to be forced to eat something. Right?
Our school does not celebrate Halloween in any way. We don't read about witches, ghosts, zombies, or Frankenstein. However, I do a huge unit on Autumn and a lot of science around the life cycle of a pumpkin. Here a just a few pictures of what we did and I have many other activities that the kids loved. Many of them come from my activity packet that is in my TpT store: Click on the picture and it will take you there: It has lots of great activities but the best is a retelling bracelet with a matching little book for the life cycle of a pumpkin. My students wore that bracelet for an entire week! 
Parents sent in lots of pumpkins and we naturally did a Bubble Map to describe it both inside and outside and they loved it! I threw it together quickly just using graphics from Susanna at Whimsy Workshop because her clip art rocks! She has made me gorgeous graphics that my students adore.
 I also made a fluency chart with my Sparkle Reader called I See a Pumpkin that is also available in my TpT store. Click on the pictures to fly over there.
 We practiced important but basic skills with simple games I created that made learning more fun.
 On our Fall Activity Day the moms came in to help and the children made a pumpkin mosaic using beans and pumpkin seeds. They loved do this project.
There is so much more to post but now I need to work on other projects to get ready for the week ahead.  Look for more pumpkin fun later in the week.
Have a great week of teaching.

Sunday, October 4, 2015

Tips for Taking the Littles to the Lab

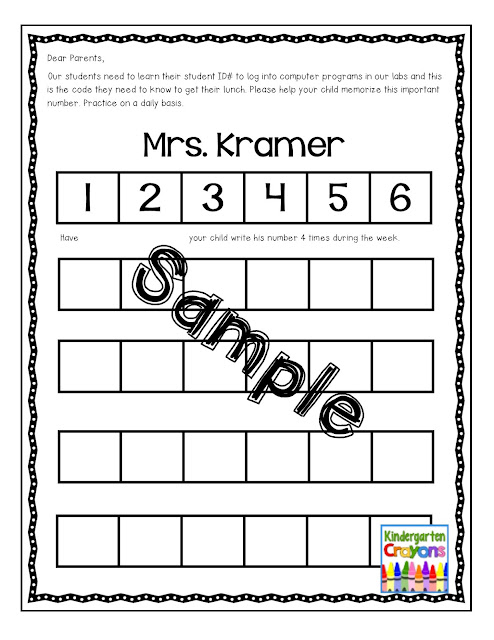
Our school has a computer lab where kindergarten students are expected to log in on their own with a a six digit student number. This is crazy since most of them cannot even read numbers and have never touched a mouse (the one used for technology) in their lives. What does a teacher do to hold on to her sanity, which is slowly slipping away?  Create a scaffold.
This works for me so don't go insane yet... there is hope.
First, I make a card for each student with their first and last name and their student ID#. I pop this up pretty big so they can see it with ease!  The number is placed in a grid so younger students have an easier time tracking it with their young eyes.  On the right side is the computer they are assigned to. Once they learn where to go you will love that they just come into the room and sit down quietly. Okay, that was a lie. This can all be done in Power Point or Publisher.
Notice that I have a boy or girl graph on the left side. I recommend changing that to a photo of each student to make this easier for buddies, (I am getting to that) the lab tech, and your poor sub who has to do this.
Are you with me so far? Once you have all your names listed in alphabetical order (by first name) with your student ID#s you are now ready to laminate. I prefer home lamination since it is thicker but do what works for you. Now cut all your cards apart and stack them. Mine even have a title card because that helps me know what I am grabbing. Here are a few extra cards I make. I also have a card with all my passwords needed for this lab! Old brain... 


Once you have all the cards you need and a few extras for new kiddos it is time to punch a hole in them and put them on a ring so you can find them! Right? I punch them in the upper left-hand corner and then use a ring to hole them all together. Does this make sense? 
Here are some pictures in "real life" of what they actually look like.


Why do you line them up by first name?
This is far easier to remember for you and your students! 
You can do this before you head for the lab.

Why do you assign them to a computer?
They know exactly where to go and it makes this process more systematic.

How do they learn how to log in with a million numbers to learn?
At the beginning I use 5th grade buddies who stand behind them and gently guide them.

Do you have them memorize their number?
Yes. I make this part of their HW and parents help them to learn this. It takes time for many children to achieve this. It is also their lunch number.

Here is a sample of what I send home:


I hope this has helped you organize your students for the computer lab. My students go there twice a week and  must also take certain assessments. This is a lot of screen time. Let me know if this helps you.

Do you want your own copy to use? Head for my FB page and grab my "fan freebie". You can edit this for your own class.  

Monday, September 7, 2015

Back to School: A Night to Remember

I have been one crazy, busy teacher with the start of school. Kids have been moved around, parents have tried to hang out in the classroom, and kids have been crying. This is all part of the chaos of starting kindergarten. 
I gave each student their own name tag which they were thrilled to have but I had to remind a few to stop sucking on it. I guess they were not feeling all that comfortable yet. 
My students are adorable but I have my work cut out for me. Many of them do not know their colors and can't write their name. Does that sound familiar?
The paperwork at the beginning of the year makes me crazy and on top of this our staff decided Back to School night should happen as soon as possible. Yup, you read that right and I was the only one waving her hand to say NO- NOT YET. I am so not ready for this. 
Why am I freaked out? I have NOTHING on the walls. My goal this week was to keep everyone IN the room and happy. This is no easy task with the bolters looking to escape if the opportunity presents itself! One tried at recess.
Anyway I have a Power Point but my old teacher partner is back with me (can I hear an AMEN) and with two new administrators some policies have changed. OMG now I needed to go back and revamp this to reflect the changes. I had good intentions but every night I would come home and crawl onto the sofa and collapse. I was so wasted by all the stress. I am way too old for this job girlfriends.


If standing up in front a million parents makes you nervous, create a PowerPoint. I include all my talking points and use photographs to support this. I try to include a few pictures of my current students to keep parents more interested.
Some topic that I include are:
1. Photos of the administrators: some parents are new to the school
2. Dress Code with photos to clarify
3. Absences and Tardies/ start up and pick up times
4. Our homework policy
5. Our classroom rules
6. Parent Volunteers
7. Skills are students should have when entering K (in a perfect world)
8. School Policies and Discipline Procedures (PBIS)
9. Explaination of CCSS and what students must master
10. Testing and Data
11. Email Info

These are just the big bullets but you don't wait this to take anymore than an hour. Keep it short and simple and you can even give them a note taking guide if you want them to remember key points.

This year I added on to this with a parent information pack:
I did not create this on my own (I am not that smart friends). I got it from a blogger who is much smarter than I am. Click here to see it. There are zillions of these for purchase but I bought this one because Learning In Wonderland provided a video and a lot of well thought out options. This lady rocks. Check out her blog and give her a round of applause for her skills. I am so grateful to her.

To keep this stress free I decided to take the masters to Office Max and let them do this. Smart, right? Wrong. So wrong. The girl took the pages out of sequence and had no idea what to do. She was so confused and kept insisting she could figure it out. She made a total mess out of it and I decided to go home and figure it out... flexible mindset. The video made it clear and once I figured out how to make my copier do a 2 sided page voila... my booklet came together.  Picking out the color palette was the best part of the project but not exactly difficult.
My husband is questioning my sanity since this took me most of the day. The poor guy does not see this as a masterpiece and a huge accomplishment. I do. I really love this but it would take a lot to talk me into changing it. Now I need a nap.
I better come up with a project for the walls. Fast.